Virtual Private Network (VPC)
To access VPC there are a number
of options:
1)The Amazon VPC console,
2)The AWS Command Line Interface
3)Amazon EC2 Command line Interface Tools and
4)Aws Tools for window Power Shell
There is no additional charge for using Amazon
Virtual private Cloud
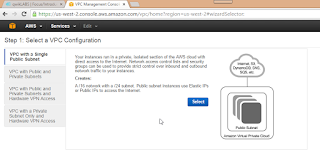
VPC Wizard to create a VPC,Network with private
IP addresses attach an internet gateway to it and subnet
Step 1: Select the first option :VPC with a Single Public
Subnet, and click Select
Return to Dashboard,
The console displays Developer
default VPC and the VPC that Developer just created. Select myvpc,
The VPC that was just created
Developer will Have one Internet Gateway for Developer
default VPC and another for the VPC that Developer Had Just created.
The VPC that was just created has 2 route
tables.
The VPC came with a main route table by default
and the VPC Wizard created a custom route table in addition.
Developer Subnet is associate with the custom route table, which means that Developer use the routes in that table to determine ,how the traffic for the subnet flows.
Developer Subnet is associate with the custom route table, which means that Developer use the routes in that table to determine ,how the traffic for the subnet flows.
If Developer add a new subnet to your VPC,It uses the main
route table by default
A security group acts as a Virtual firewall to control the traffic allowed into its
associated instances
To create a Security Group
Step 1:Open the Amazon VPC console. Click Security groups in
the navigation pane.
Step 2:Click on Create Security Group
Populated with the following
fields, and then click Yes, create
.
To add rules to the webserversg
security group:
Go to Security Groups->select the webserversg security
group that Developer just created.
On the inbound Rules tab, click Edit and add rules for
inbound traffic as follows:
Select HTTP from the Type list, and enter 0.0.0.0/0 in the
source field
Click Add another rule, then select HTTPS from the Type
list, and enter 0.0.0.0/0 in the source field
Click Add another rule, then select SSH from the Type list,
and enter 0.0.0.0/0 in the source field
If Developer use 0.0.0.0/0 in Source field ,Developer will enable all IP
addresses to access your instance using SSH
In Production ,Developer "ll authorize only a specific
IP address or range of addresses to access instance
Associating EC2 Instances with VPC and Security Group Created
Go to Aws Management console ->EC2 Instances ->Click on Launch Instance
Select Instance AMI(Amazon Machine Image ) from free tier a Micro Instance
Add Storage Page Keep default setting
Go to Aws Management console ->EC2 Instances ->Click on Launch Instance
Configure Instance details ,Select the Default config
On Instance Tag in Value provide name of instance for ex myec2instance
Select the Radio button with label Select an existing Security Group
On Next page select Key-Pair created earlier from drop down Menu
Click on Instance from Navigation Pane to see status of newly created ec2 Instance
Associate Elastic IP Address to EC2 Instance ,Click on Network & Security ->Elastic IP
Click on Allocate New address ,Window Prompt will Appear for confirmation,Click on Yes,Allocate
Confirmation Screen will Appear with IP Address
Next Step to Assoiciate IP to Instance
Associate Window prompt will Appear ,provide the Instance ,AMI details to Associate
Go to Instance from Left Navigation Pane ,and See Instance status should be 2/2 Checks
Deleting the VPC
Deleting a VPC also deletes resources that are associated with
the VPC such as subnets, security groups
,network , ACLs ,DHCP options sets, route tables, and
Internet gateways.
Open the VPC console->Select Your VPCs
From Action Drop-down, click on
delete VPC
When prompted for confirmation, click Yes, Delete


No comments:
Post a Comment